Pages

Monday, March 25, 2013

Easy Easter Baskets

In our last meeting for my Daisy Girl Scouts, we covered the "Make the world a better place" petal.  After think long and hard about what we can do, I settled on 2 projects - this one and a projected with cups.  But more on that one later.

Since I love to save things to see if I can give them a "new life", I had saved about 10 boxes of old cereal boxes.  Originally, I saved them so I could cut them on my cricut to make cheap chipboard books, but this works to.

With Easter literally around the corner, I figured a craft with the cereal boxes and Easter related... behold the Easter Basket.


Supplies that you will need:
  • 1 cereal box
  • 2 brads
  • Paper cutter
  • Scorer
  • corner rounder
  • paper piercer
This is a pretty easy craft and the math is simple so you can make it either larger or smaller.  Math to remember: 3:1 - so if you have a 3 x 3 square, your scores are going to be every 1 inch; 6x6 square, score every 2 inches; and so on.  Easy right?!

So after you cut your size that you want, make sure you save a piece for your handle.  The size really depends on how long you want the handle. Just place this aside until you need it.


2 sets are shown here
Ok.  Now that we are have the base cut, score your lines.  Your square will look like a tic tac toe set up.  You will need to cut on opposite sides, along the score line to where it crosses the first score line.  Make a total of 4 cuts. Next, you will want to round the corners.
On the side that you made two cuts, bring the corners up to cover up the middle flap.  Place the handle in between the corners and the middle flap.
Next grab your paper piercer and poke a hole through all 4 layers. Be careful...

After you get your hole, take a brad and place it in the hole.  Do the same thing to the other side. 

Then, voila, your finished!


The basket with the bunny on it, my little Daisy made it.  The green basket is just a 12x12 paper cut down to 9x9.  I used the scraps (3x12) to make the handle and used the i-top tool to make the brads.

Thanks for stopping by.

Saturday, October 13, 2012

Halloween Mummy Treat Container

2 years ago I made cute mummy treat holders from toliet paper rolls. They are so easy to make and a good way to recycle those rolls.  I wanted to share this with you as an easy thing to do for your kids class...


You will need:

Toliet Paper Roll
Crepe paper - white
2 eyes
Glue dots
Candy

Start at the top of the roll and add 2 glue dots, attach crepe paper. Roll the paper down and add candy to the inside of the toliet paper roll. Wrap it around twice and then turn and fold over and start wrapping it around the roll. You will want to keep this close together so that the brown roll is now showing through the paper. When you get to the top come back down, but not as close together, leaving some space inbetween each layer.  When you get back to the bottom, attache the end securely.

Add eyes where you can cover some of it with the paper.

Your done. Fast easy and it only took a few mins to complete.   Thanks for stopping by today.

Thursday, October 11, 2012

Halloween Matchbook Treats

If you are like me, you don't have time for much, but you want to do it all.

In 2010, I only made 20 treats for my Daughters class.  They were cute and adorable - they were Mummy's from toliet paper rolls.  You can find the tutorial here.

Last year for Halloween, I made treats for both kids.  So I had 40 in the my daughter's Pre-K class and 20 in my son's daycare class.  I went a little over board last year - I started in August.  The pre-k class received sourcream bat containers with candy and the daycare class got treat sticks...I will write up a tutorial for them.

There is just NO WAY I can do that this year.  I don't have time... I will admit it.. I do not have time to make treats like I did last year.  SO, this year I will make easier ones.  : )

So cute little matchbook treats for all... I have to make 58 of them... so lets just make it an even 60.  I only have about 3 hours to dedicate to this project....so I will let you know how long it is going to take me when I am finished.

Lets get started.  Here is my Sample:


So you will need to do the following:

1 12 x 12 of solid paper (you can get 5 treat bottoms out of this) - I go with black
1 12 x 12 of pattern paper (you can also get 5 treat tops out of this) - $1 pack from Walmart


Cut your solid at 8-1/2" x 3". Score the on the long side at 3/4" and 4-3/4".


Fold the match box with the 3/4" score and staple about 1/4" from the bottom.


Cut two pieces of the pattern paper; one each 3-1/2" x 2-3/4" and 3-3/4" x 2-3/4". Ink around the edges with black and attach to the outside of the matchbox.  

Cut another piece of the patter paper at 2-3/4" x 1/2". Ink around the edges and and attach to the short flap on the front as shown.


Insert the treat (M&M's and Skittles work great) and tuck the long flap in.

Now for the Optional Belly band.  This will mess up the paper count, but you can do this part if you want. Cut another piece of the pattern paper at 1" x 7". Ink on the long edges. Wrap around the matchbook and attach in front with a glue dot.

Punch a Scallop Circle in a pattern paper and apply glue to the belly band or to the front of the matchbook in front and attach the Scallop Circle.

And your done.  Remember, this is for a Pre-K class and a kindergarten class... looks don't matter... this just gives them something to do before they get to the good stuff.  Plus it makes us mommies feel good.  :)


That's it for today. Thanks for checking in!

 - Kristie

Wednesday, October 10, 2012

Treat Bag Purse


My DD is having her 6th birthday party in a few days and I still need good bags.  I looked and could not find anything that I loved so I am going to make them.  We are having a Pretty Pretty Princess Party, we needed something to carry, that was cute and super cheap.  So the cute canvas bags were out.

We went to the Scrapbook Expo to see if we could get some ideas and having a 6 year old with you, you know that you'll be doing some mak-n-takes.  We stopped at this booth that were making this really cute paper bag purse... LIGHT BLUB!!  I have all of this stuff at home, and if it is a make-n-take, it has to be easy.  So we sat down and my princess did the make n take and Mommy was smiling!!


Since all bags are different, you will need to adjust the cuts according to your bag.

To make one you will need:

1 paper bag (you know those brown bags that you can do 101 things with, more on that later)
1 pattern piece of paper and 1 solid piece of paper (or double sided paper)
coordinating ribbon for the handle
velco for the closure
embellishment
Scoreboard
Cutter
Double sided Tape
Regular Tape
ink (optional)


I am using double sided paper from Keller's Creations.  I just love their items and they are all made in the USA.  The paper is grown and made right in GA.  Check out their stuff here.


 Cut your paper bag to 4".


 Fold your flap down to make both sides - front and back - flat.


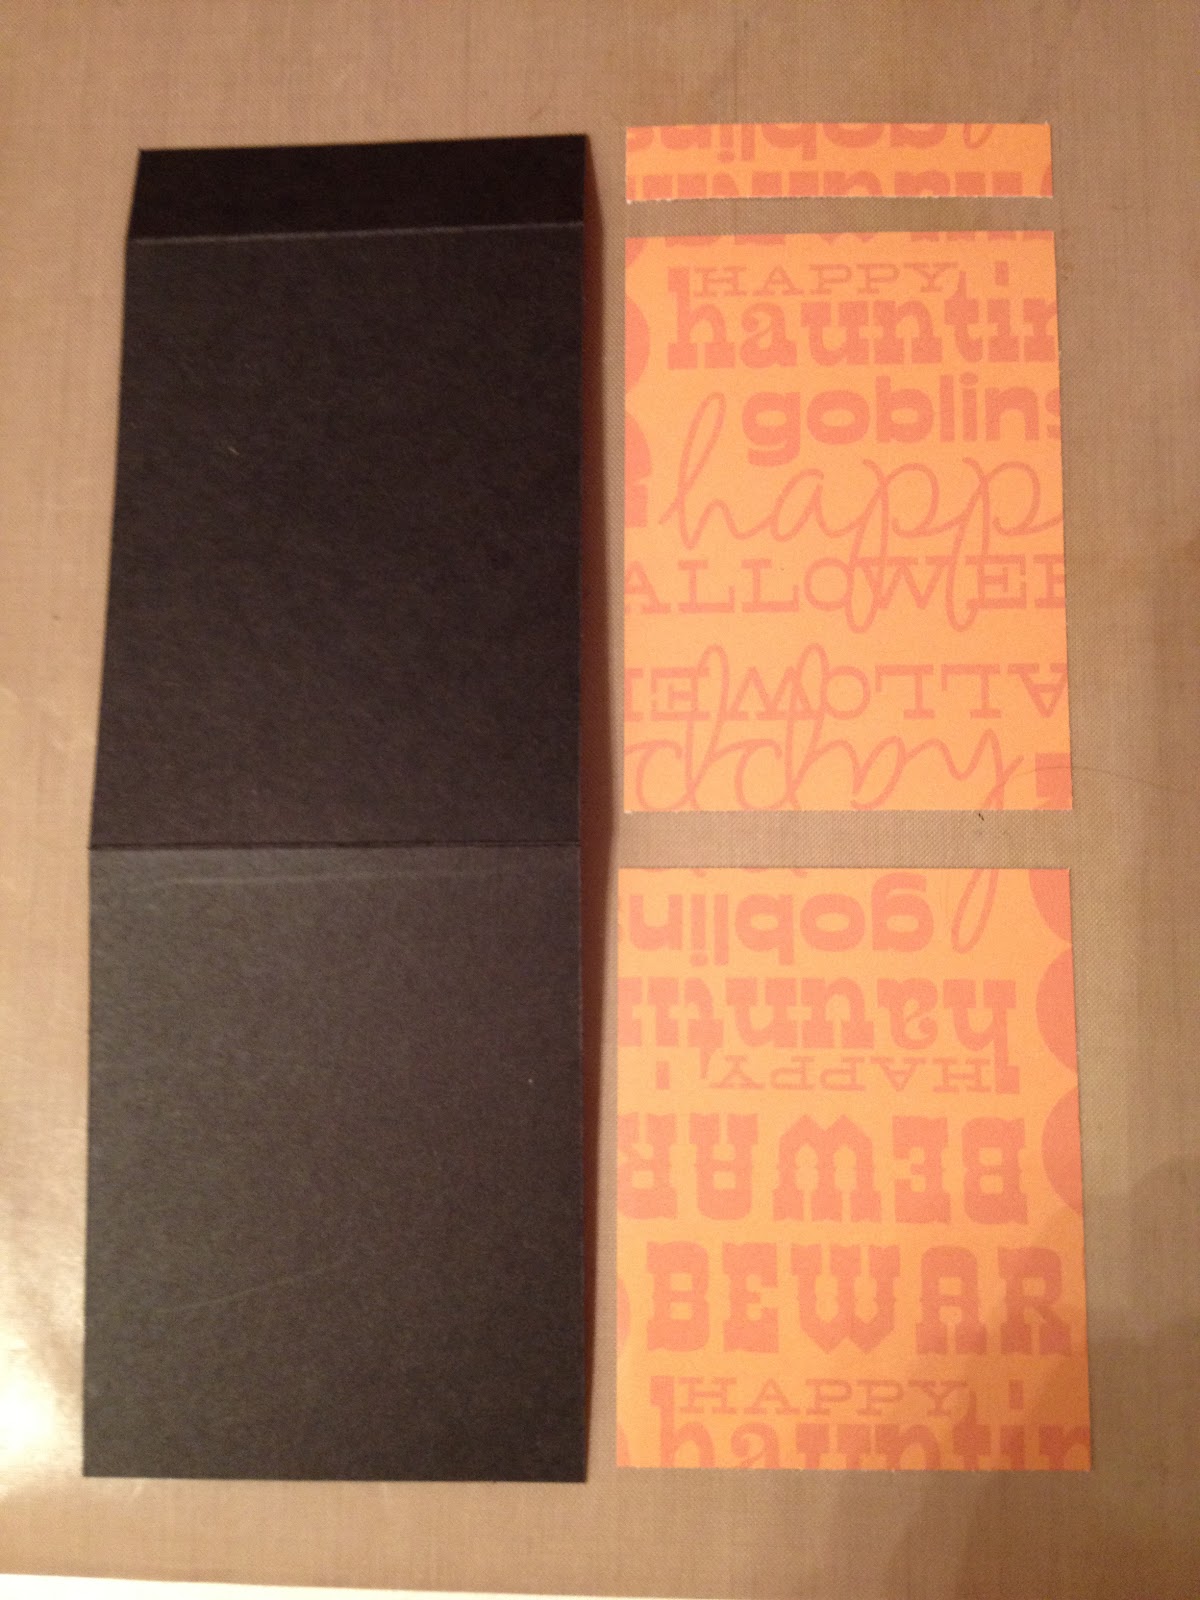
Cut your pattern paper to 5 1/4 x 4, 5 1/4 x 4 1/4, and 5 1/4 x 1 3/4.


 Cut your solid paper to 5 1/2 x 4 1/2 and 5 1/2 x 6 1/2.


 Ink to your hearts content.  My favorite part.  :)


 Score your solid paper at 4 1/2 " on the longer side.


 Tape down your pattern paper to your solid paper.  Keep the pattern paper close to the bottom of the solid.  The top flap will hide the extra space (if any) on your solid paper.


 Get out your Crop-a-dile and punch holes for the handles.  The holes go on the longer piece and you place the marking under the fold on the larger side of the pattern paper... hope that makes sense. I used the larger hole on the hole punch.


 So you will have something like this.


 Now grab some ribbon that coordinates.  I used the ribbon that is sold at Keller's Creations.  All their lines match in one way or another.

I do not know the length that I used, so use your best judgement.  I string it in and then decide where I am going to cut the length at.  After you get the size you want, make sure the ribbon looks nice on the outside, and then tape the inside really good.  You can double sided tape for this, but since you can't see it, i just used scotch tape.


 Now here comes the most important part of the whole project.  If this is not correct, your bag will not last 1 minute with a 5/6 year old.  Trust me... our bag from the Expo was destroyed before we got home.

Use really good double sided tape and tape on the brown page all the way around as CLOSE to the edge that you can.  I used Red Line tape (that I also got from Keller's Creations) to show you what I mean.

After you have placed your tape, take the bag to the paper.  You want to line your bag on the paper and not the other way around.  The bags are not straight and they look really funny if you do it the other way.

After you get one side come completed, tape the other side.  With the second side, you are going to line your papers together... so take your paper to your bag.  Again the bags are not straight, so if you line up your paper to the bag, you will have a crooked purse.

Now open your bag and admire your work... 


With the bag open, grab that Velcro tab that you have.  While the Velcro is closed together, take the paper off and adhere to the top flap on the inside of the bag and close the flap to where you would like it to be.  This is the time you can make sure it is level on the top and sides.
 

Ok so now we are to the point were we need to let those little 6 year olds know where they have to open the bag.  Originally I was going to use a button, but I didn't like the size and to be honest it was BLUH.  So I was going through my Keller's Creations supply box and found these cute cut outs that had 2 hearts in them.  The pinks kinda matched so why not.


Ink those babies and tape together.  When you put them on the bag, you want to place it so they are half on the flap and half off the flap.
 
Here are two finish products to see, front and sides.  Just look what I was able to fit into it.


Thanks for stopping by my little spot in the world.

Friday, July 8, 2011

Home Made Chore Chart

My husband suggested that we get a chore chart to keep track of the "adult" chores for the house. Of course this is the greatest idea ever, but you couldn't find one that we really liked in the stores. Everything looked cheap and no really useful.

So we go the great resource available to us - the internet and google - and search for chore charts. Alot of them were great creations, but nothing really cried out to me. I did combine the parts that i liked to create our chore chart.

I didn't take pictures along the way, but i do have the finish product.


In order to create this chore chart you will need the following:

12 x 18 sheet of metal (Lowes - $4.99)
12 x 18 frame (Discounted from Micheals)
1 12 x 12 and 12 x 6 scrapbook paper (to cover the metal)
i-top tool
i-top magnet daddies - medium size
i-top medium die cut
Coordinating paper for i-top magnets
tags
Coordinating ribbons
Coordinating sticker abc's
Spray adhesive

1. Spray the metal with your adhesive and cover with your 12 x12 and 12x6 paper. Be careful when placing the paper down, as the adhesive dries quickly.

2. Punch out your i-top covers. You will make as many magnets as need for your chores in your house, we did 10 total.

3. Use your i-top tool to cover the top of the magnet. Before you attach the bottom, place your tag in between the top and bottom of the daddy, and then attached the two pieces. You will use this tag to write your chores on it.

4. Use ribbon to create a "T" chart. use the stickers to write the names above the "T". One side of the "T" will be for "to do's" and the other "done".

5. Take the glass out of the frame and place the metal inside. it will be very snug so you have to play with it to get it in.

6. Place magnets on board and assign the chores and your done.


Super cute, super easy and it only cost me $20. I used a paper kit from QuickQuotes ($0), Metal was from Lowe's ($5), the Frame was discounted from $45 to $10 plus 40% coupon at Micheal's ($6) and the i-top magnet daddies were $4 and we purchased 2 of them.

Thursday, June 2, 2011

FREEBIES!!!

I love FREEBIES!! I love that there are people out there that are so talented and willing to share their work with the less talented people (that's me).

Every other month, The Blog train Blog hosts a blog train - hence the name of the blog. :) This month the theme is Monkey-ing Around. All of the product follows a color swatch for their freebie kit.

Check them out! All items are suppose to be up for a month for free download, but some take them off before the month is up. Catch them while their hot!!

http://blogtrainblog.blogspot.com/2011/06/junes-blog-train-is-here.html

Wednesday, June 1, 2011

Our First Meeting

Althought the title is not completely accurate, Ryan and I did meet in Arizona at a work event. At every property, we hold a number of events. The one that Ryan was trying to ask me out at was called "Broker's night".


The product that was used for this page is called Shabby Fall page set created by Shabby Princess.


364 days

3 layouts

1 year completed (in Oct. 2005)